Bootstrap Checkbox Example
Overview
In some instances the elementary items might actually become extremely important-- especially when you come to need them. For instance how do your site visitors interact with the pages you set up stating a basic Boolean action-- simply yes or no concerning a number of the questions you have to ask, exactly how they do approve the conditions and terms or line up a few of the attainable preferences they might possess. We typically surpass this with no paying enough of an consideration to the element responsible for these kinds of activities however the Bootstrap Checkbox Toggle is actually a pretty significant component-- one our forms can't really complete without.
Within the latest fourth edition of the Bootstrap system we are offered with the
.form-check.form-check-label<div>.form-check.form-check-label<label><input>.form-check-inputThe ways to put into action the Bootstrap checkbox:
Bootstrap's
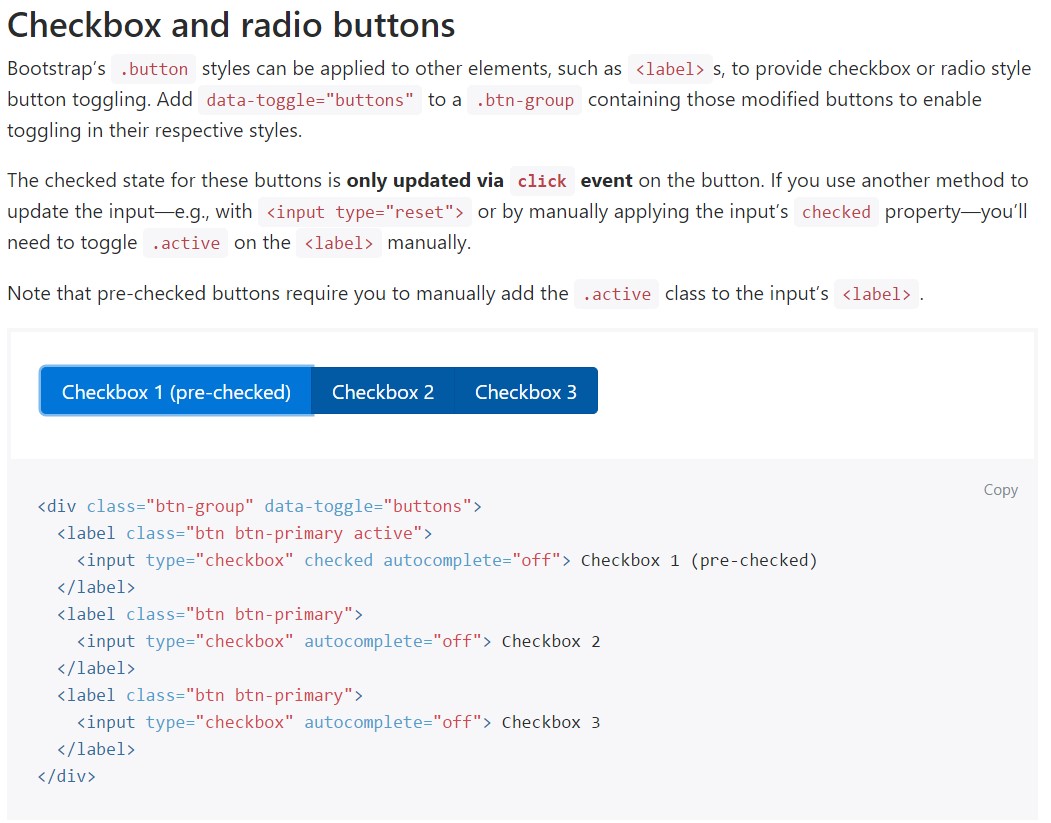
.button<label>data-toggle=" buttons".btn-group
<div class="btn-group" data-toggle="buttons">
  <label class="btn btn-primary active">
    <input type="checkbox" checked autocomplete="off"> Checkbox 1 (pre-checked)
  </label>
  <label class="btn btn-primary">
    <input type="checkbox" autocomplete="off"> Checkbox 2
  </label>
  <label class="btn btn-primary">
    <input type="checkbox" autocomplete="off"> Checkbox 3
  </label>
</div>
In some cases we require the checkboxes to be within our forms without the site visitor really having the ability to have any sort of activity clicking them-- that's where the disabled option comes in.
To disable appropriately a checkbox in Bootstrap 4 employing the typical HTML attribute
disabledIn case that you really like the suggestion and indeed really want to carry this out you really should assign the
.disabled.form-checkOne other scenario
If utilizing checkboxes, wrap all of them in a
<label>.custom-control.custom-checkboxEmploy
.custom-control-input<input>Also employ two
<span>.custom-control-indicator.custom-control-description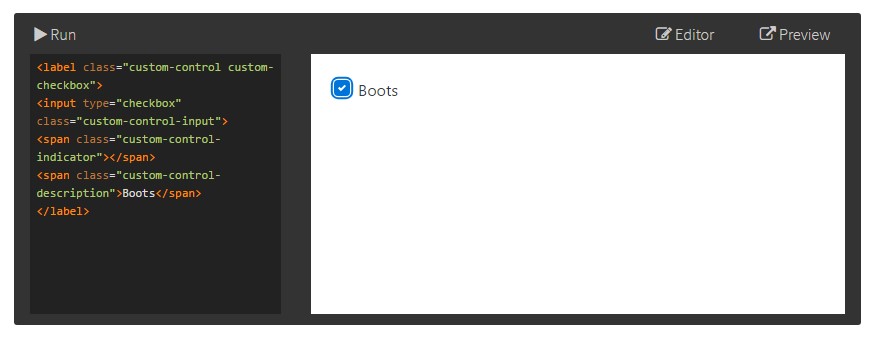
<label class="custom-control custom-checkbox">
<input type="checkbox" class="custom-control-input">
<span class="custom-control-indicator"></span>
<span class="custom-control-description">Boots</span>
</label>
Bootstrap Checkbox State forms
Default radios and checkboxes are developed upon with the help of
.form-checkThe disabled class will at the same time make lighter the message color to help indicate the input's state.
A new feature for the Bootstrap version 4 system is the arrival of the so called custom form components. These are actually the same elements we are known in functionality though designated even more eye-catching and with the Bootstrap manner. Having them you can surely add in special taste as well as charm to your information by simply just selecting a couple of additional classes to the commands you provide in your forms.
If you want to use customized checkboxes wrap them in a
<label>.custom-control.custom-checkbox<input>.custom-control-input<span>.custom-control-indicator.custom-control-descriptionConclusions
That's mostly everything you should complete in order to set a checkbox element inside of your Bootstrap 4 powered web site and put in some customized flavor to it bring in it a cool looks. Currently everything you require to do is repeat the drill until you have actually inspected all of the checkboxes needed are already on the web page.
Check out several online video training relating to Bootstrap checkbox
Linked topics:
Bootstrap checkbox formal information
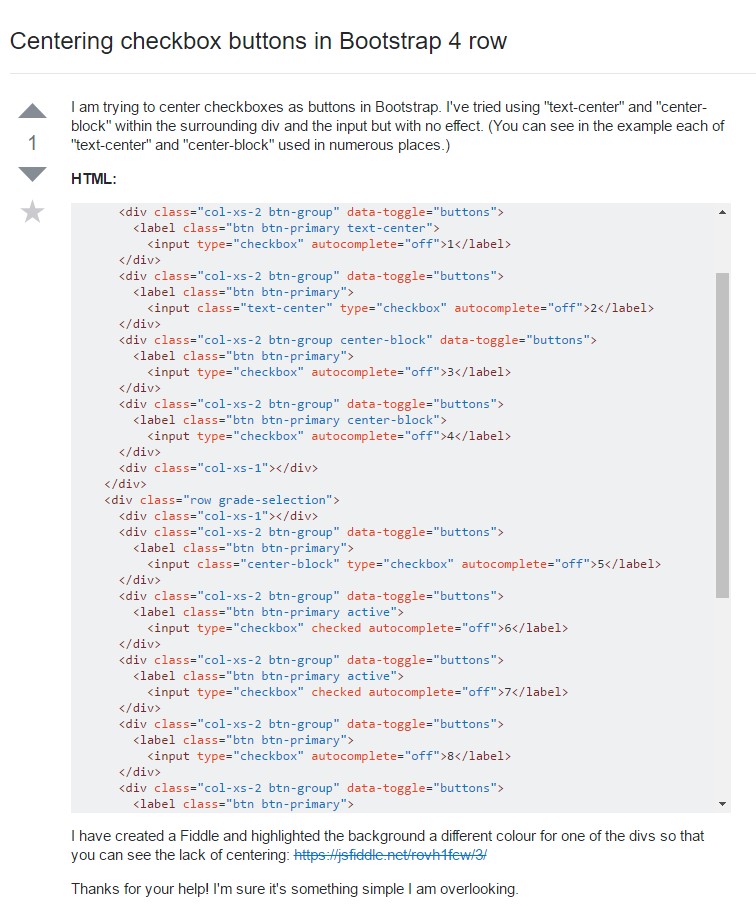
Centering checkbox buttons in Bootstrap 4 row
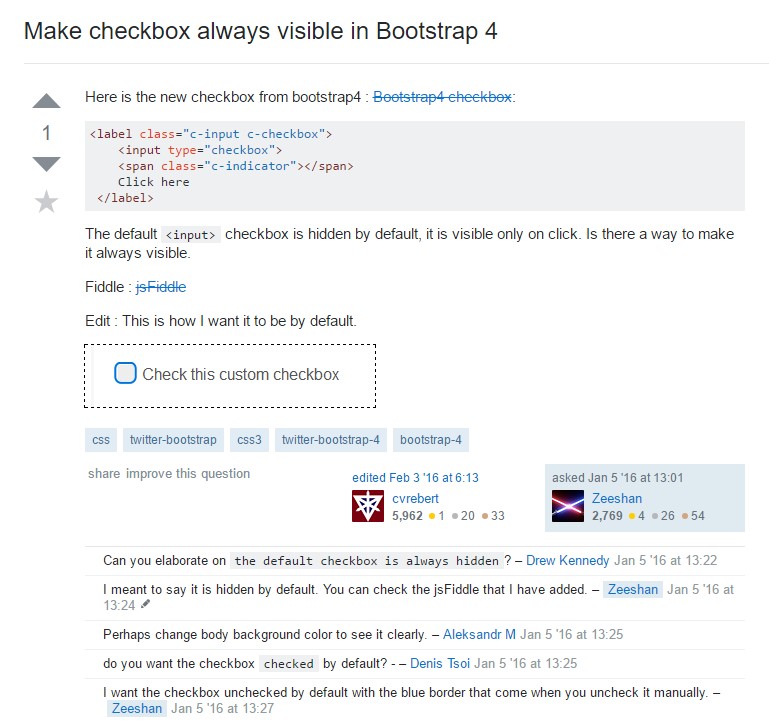
Make checkbox always visible in Bootstrap 4